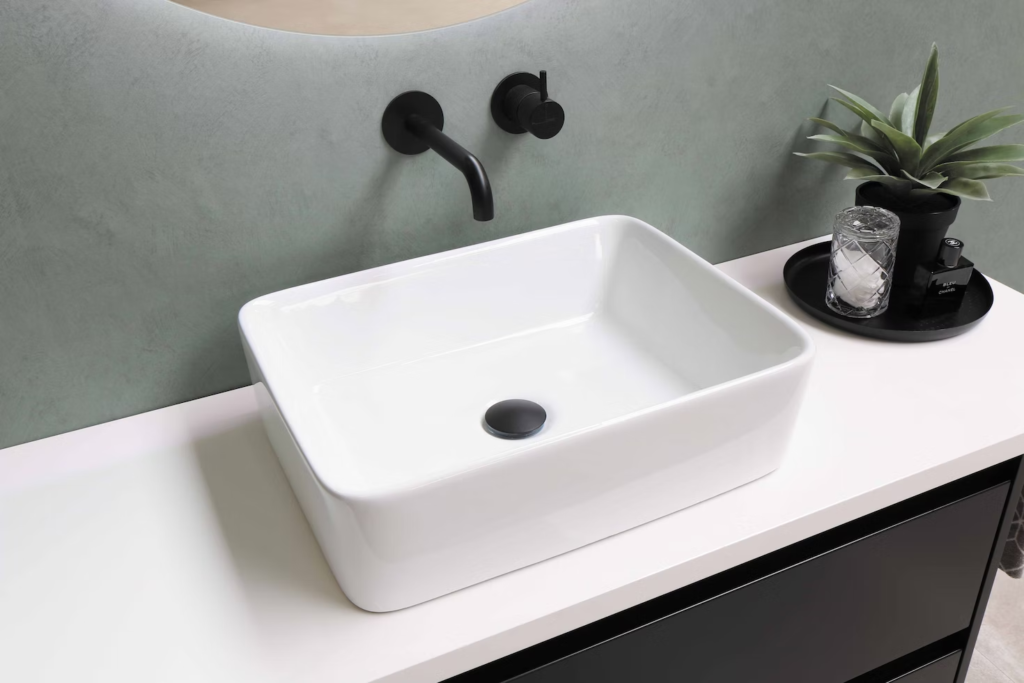
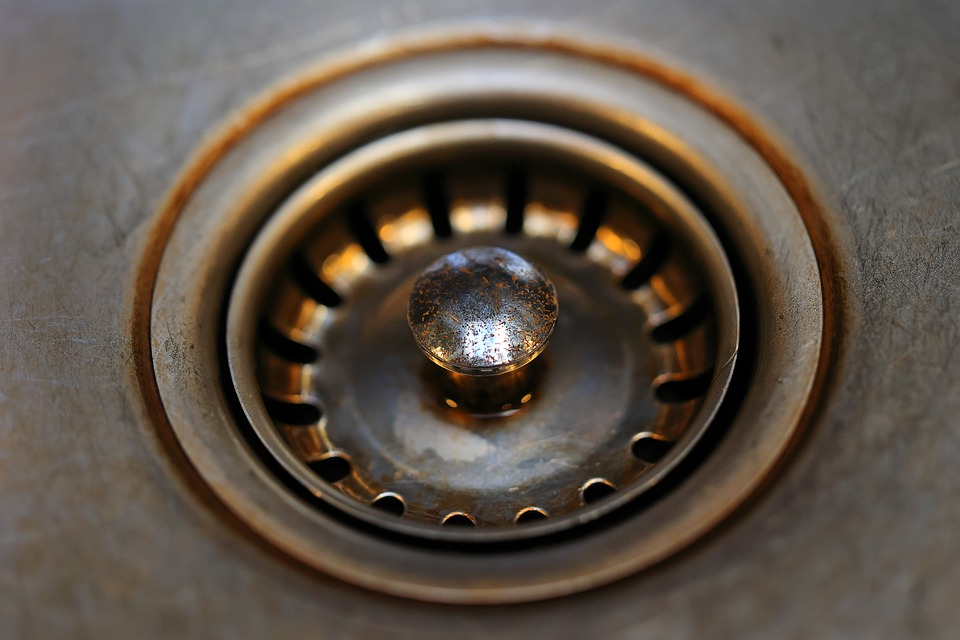
Call Us Now

301-671-0447

Reach Us Now

customerservice@your1plumber.com

Blogs

Setting the Temperature on Your Water Heater

The majority of injuries and deaths involving tap water scalds are to the elderly and children under the age of five.

The U.S. Consumer Product Safety Commission (CPSC) urges all users to lower their water heaters to 120 degrees Fahrenheit. In addition to preventing accidents, this decrease in temperature will conserve energy and save money.

Safety Alert: Tap Water Scalds!

Most adults will suffer third-degree burns if exposed to 150 degree water for two seconds. Burns will also occur with a six-second exposure to 140 degree water or with a thirty second exposure to 130 degree water. Even if the temperature is 120 degrees, a five minute exposure could result in third-degree burns. Various procedures for lowering water temperature in the home exist, depending on the method of heating. Here are some suggestions:

Electric water heaters. Call your local electric company to adjust the thermostat. Some companies offer this service at no-charge. Hot water should not be used for at least two hours prior to setting. To make the adjustment yourself, start by shutting off current to the water heater, then turn off the circuit breaker to the heater or remove the fuse that serves the heater. Most electric water heaters have two thermostats, both of which must be set to a common temperature for proper operation. To reach these thermostats you must remove the upper and lower access panels. Adjust the thermostat following the instructions provided with the appliance. Hold a candy or meat thermometer under the faucet to check water temperature.

Gas water heaters. Because thermostats differ, call your local gas company for instructions. Where precise temperatures are not given, hold a candy or meat thermometer under faucet for most accurate reading first thing in the morning or at least two hours after water use. If reading is too high, adjust thermostat on heater, according to manufacturer’s instructions, and check again with thermometer.

Furnace heater. If you do not have an electric, gas, or oil-fired water heater, you probably have an on-line hot water system. Contact your fuel supplier to have the temperature lowered. If you live in an apartment, contact the building manager to discuss possible options for lowering your tap water temperature. Reducing water temperature will not affect the heating capacity of the furnace.

CPSC notes that a thermostat setting of 120 degrees Fahrenheit (49 degrees Celsius) may be necessary for residential water heaters to reduce or eliminate the risk of most tap water scald injuries. Consumers should consider lowering the thermostat to the lowest settings that will satisfy hot water needs for all clothing and dish washing machines.

Never take hot water temperature for granted. Always hand-test before using, especially when bathing infants and young children. Leaving a child unsupervised in the bathroom, even if only for a second, could cause serious injuries. Your presence at all times is the best defense against accidents and scalding to infants and young children.


U.S. Consumer Product Safety Commission – Document #5098

Kerosene Heater Safety

If you are using a kerosene heater, the U.S. Consumer Product Safety Commission and the National Kerosene Heater Association advise you to follow these suggestions in order to minimize the risk of fire and potential health effects from indoor air pollution.

  • Use only water-clear 1 K grade kerosene. Never use gasoline. Gasoline is not the same as kerosene. Even small amounts of gasoline or other volatile fuels or solvents mixed with kerosene can substantially increase the risk of a fire or an explosion.
  • Always store kerosene in a separate container intended for kerosene, not in a gasoline can or a can that has contained gasoline. This helps you avoid using contaminated fuel or the wrong fuel by mistake. Kerosene containers are usually blue; gasoline containers are usually red.
  • When purchasing kerosene at the pump, make sure to use the kerosene pump, not the gasoline pump. Some service stations have separate islands for kerosene. Some oil companies have also established quality control programs to minimize the chances of gasoline contamination of kerosene.
  • 1-K grade kerosene should be purchased from a dealer who can certify that what is being sold is 1-K. State operated and private sector certification programs that ensure the quality of kerosene are established in some states. Grades other than 1-K can lead to a release of more pollutants in your home, posing a possible health risk. Different grades of kerosene can look the same so it is important that the dealer certify that the product sold is 1-K grade kerosene.
  • Never refuel the heater inside the home. Fill the tank outdoors, away from combustible materials, and only after the heater has been turned off and allowed to cool down. Do not refuel the heater when it is hot or is in operation. Do not fill the fuel tank above the “full” mark. The space above the “full” mark is to allow the fuel room to expand without causing leakage when the heater is operating.
  • In case of flare-up or if uncontrolled flaming occurs, do not attempt to move or carry the heater. This can make the fire worse. If the heater is equipped with a manual shut-off switch, activate the switch to turn off the heater. If this does not extinguish the fire, leave the house immediately and call the fire department. As an added reminder and precaution, install at least one smoke detector near each sleeping area or on each level of the house.
  • Reduce your exposure to indoor air pollutants by properly operating and maintaining your portable kerosene heater. Although portable kerosene heaters are very efficient in the burning of fuel to produce heat, low levels of certain pollutants such as carbon monoxide and nitrogen dioxide are produced. Exposure to low levels of these pollutants may be harmful, especially to inpiduals with chronic respiratory or circulatory health problems. To assure that you and family members are not exposed to significant levels of these pollutants, you should follow carefully the following rules of safe operation:

Operate your heater in a room with a door open to the rest of the house.

If you must operate your heater in a room with the door closed to the rest of the house, open an outside window approximately an inch to permit fresh air to effectively dilute the pollutants below a level of concern.

Always operate your heater according to the manufacturer’s instructions, making sure that the wick is set at the proper level as instructed by your manufacturer.

Keep the wick in your heater clean and in good operating condition by following the cleaning and maintenance procedures recommended by the manufacturer.

Keep an outside window opened approximately an inch to insure adequate fresh air infiltration. This is true regardless of whether you use a kerosene heater or some other conventional method of heating, if your home is relatively new and tight, or if it is older but has been winterized to reduce air infiltration from the outside.

CAUTION: Improper fuel may cause pollution and sooting of the burner. Use only water clear No. 1-K Kerosene.

DANGER: Risk of explosion. Never use gasoline in this heater.

CAUTION: Risk of indoor air pollution. Use this heater only in a well ventilated area. See operating instructions for details.


U.S. Consumer Product Safety Commission (CPSC)

How is Water Treated?

water-treatment

Prechlorination

Chlorine is added to the raw as it enters each plant. Chlorine kills microorganisms such as bacteria, protozoa, and viruses that may cause illness in humans. Chlorine also prevents the growth of algae at the treatment plant that may interfere with treatment of water and cause taste and odor problems. Enough chlorine is added to maintain a residual of 1 part per million or residual chlorine in water after filtration. A chlorine residual is needed to prevent re-growth of bacteria in the piping network otherwise known as the distribution system.

Coagulation/Flocculation

Alum (aluminum sulfate) is added to the water to destabilize natural fine particulate matter suspended in water. This process in known as coagulation. These particles enter water through land erosion, airborne contaminants, decay of natural organic matter such as plants and animal wastes, and discharges resulting from human activities. The impurities found in water suspensions consist of charged colloids (colloid – a very small solid suspended in water which varies in size, density and electric charge) ranging in size from 5 nm to 1 um and particulates greater than 0.5 mm. Most of these particles will not settle by gravity due to their charge and because they are lighter than water (their density is less than water). The addition of alum causes these particles and colloids to clump together to form heavier particles which will settle in water.

Alum is added quickly to the water at the plants using mechanical mixers. This process is known as Rapid Mix. After passing through the Rapid Mix process, the water travels through flocculation basins where it is gently stirred by slow moving paddles. Gentle mixing brings small particles into contact so that they will collide, stick together, and grow to a size that will readily settle. These large particles are referred to as floc. Formation of proper floc is necessary for particles to be removed during sedimentation and filtration.

Sedimentation

After flocculation, the water and floc moves slowly through large basins known as sedimentation or settling basins.

sedimentation

The water moves very slowly through these basins due to their large size. This allows the floc to settle to the bottom of the basin. The floc that falls to the bottom of the basins is collected into a hopper by large rotating scrapers where it is removed several times daily by the plant operators. Clear water above the floc layer (referred to as treatment residuals) flows out of the sedimentation basin and to the filters. Removal of particles in the sedimentation basin improves the operation of the filters that comprises the next treatment process after sedimentation.

The sedimentation process removes many particles including clay and silt based turbidity, natural organic matter, and other associated impurities. These impurities include microbial contaminants, toxic metals, synthetic organic chemicals, iron, manganese and humic substances. Humic substances come from soil are produced within natural water and sediments by chemical and biological processes such as the decay of vegetation. Removal of humic substances from drinking water is desirable since they form disinfection byproducts when chlorine is added to the water. At high concentrations, disinfection by-products such as trihalomethanes are a public health concern.

Filtration

The last step in purifying the water is accomplished by passing water through a bed of sand and gravel.

filtration

As water filters through the sand, the remaining particles of suspended matter are trapped in the sand bed. In the filtration process, water flows on top of the sand bed and travels through the bed until it is collected at the bottom in underdrains. Filtered water flows from the underdrains into clearwells or filtered water reservoirs. The rate of filtration is regulated using controllers. The filters must be cleaned periodically as material becomes trapped in the filter and reduces the rate of filtration. Cleaning of the filters is also needed to prevent solids from passing through the filters into the filtered water. To keep the filters operating at their best performance, the filter operators take each filter out of service so they can be backwashed. Backwashing cleans the filters by forcing clean water backward through the sand to remove the solids which are deposited in waste drains. Filters are backwashed on a rotating schedule to ensure that plants can continuously operate.

Fluoridation

Fluoride is added to the filtered water at each of the plants to reduce tooth decay. The plants maintain fluoride levels of approximately one part per million in the treated water.

flouridation

Post-Chlorination

If needed, additional chlorine is added to the finished water that leaves the water plants. Low levels of chlorine (approximately 0.2 to 1.0 part per million) must be maintained in the distribution systems pipes and home plumbing to prevent the growth of microorganisms.

Corrosion Control

Lime is added to the treated water at the water plants before the water is added to the distribution system. Lime (or calcium oxide) is added to raise the pH of the water to a level of about 8 standard units. The process reduces the ability of the water to corrode water mains and home plumbing materials such as copper, lead, and brass. Corrosive water can dissolve lead and copper. Excessive levels of dissolved lead and copper are public health concern particularly for young children.


Source: http://publicworks.baltimorecity.gov

Identifying and Fixing Common Toilet Leaks

Are you a do-it-yourselfer? Here’s a step-by-step guide on how to identify and fix common toilet leaks.

Toilet leaks can waste as much as four to five gallons of water per minute and cost you up to $100.00 per month in increased water and wastewater bills. Toilet leaks occur in two ways and are often very difficult to detect.

Flush Valve (Flapper) Ball Leak

The most common toilet leak and often hardest to detect is caused by a deteriorated or defected flush valve (flapper) ball at the bottom of the toilet tank. If the flapper or ball valve does not seat properly and form a water tight seal, water will leak around it into the toilet bowl. Often, this leak will occur without being heard. To test for this type of leak, add a few drops of food color or place a colored dye tablet (available from many hardware stores or possibly your water utility) in the toilet after it has stopped filling.

An Easy Way to Check for Flush Valve Leaks:

In just minutes, you can find out if a toilet is wasting thousands of gallons due to an undiscovered water leak. Here’s how:

  1. Remove the tank lid, then flush
  2. After the flapper/tank ball drops and the tank refills, add several drops of dark food coloring) or a fluidmaster leak detector tablet).
  3. Wait at least 20 minutes.
  4. If any trace of color appears in the toilet bowl, there is a leak.

Solutions to Fix Flush Valve Leaks

Replacing Float Cup Fill Valve

Replacing a Float Cup Fill Valve

  1. Adjust height by twisting shank in/out of valve body.
  2. Position valve in tank.
  3. Turn on water.
  4. Adjust water level.

Replacing a Float Ball (Ballcock) Fill Valve

Replacing a Float Ball (Ballcock) Fill Valve

  1. Check height and adjust if necessary
  2. Place valve in tank inlet hole, making sure rod arm position allows proper movement of float ball
  3. Screw rod arm into valve arm
  4. Screw float ball onto rod arm
  5. Turn on water supply

Replacing a Tank Ball

Replacing a Tank Ball

  1. Slide lower life wire through upper lift wire, then through guide arm on overflow pipe
  2. Thread tank ball onto lower lift wire
  3. Align tank ball over drain seat, keeping wire vertical
  4. Check operation to be sure ball seats properly

Replacing Flush Valve

Replacing a Flush Valve

  1. Cut new overflow pipe to match height of old pipe
  2. Install valve by tightening lock nut ½ turn beyond hand tight
  3. Slide gasket onto threaded end of valve
  4. Connect flapper chain to flush lever
  5. Attach refill tube to overflow pipe
  6. Reconnect tank to bowl

Float Ball (Ballcock) Valve Leak

The second most-common type of leak is caused by an improperly adjusted or broken fill (ball cock) valve.

Water Level Adjustment Clip

If the float is set too high or if the shut-off valve fails to close completely, water will continue to enter the tank and flow into the overflow tube. This type of leak can be seen simply by taking the tank top off and observing if water is flowing into the overflow tube once the tank is full.

The solution to this type of toilet problem is to reset the tank water to a lower level by using the fill valve’s water level adjustment clip. If it is a Float Cup-type valve, squeeze the two sides of the metal clip together, then slide clip down the rod. In the case of a Float Ball-type valve, lower water level by bending float arm slightly downward.

Need a Little Friendly Advice or Assistance?

If you have trouble with any part of this process, give us a call and if we’re not immediately available to assist you, one of our technicians will return your call at the very first opportunity.

Or, if the project proves to be more than you care to tackle yourself, here’s a $25 savings you can apply to our professional installation services!

Toilet Repair Coupon

Selecting & Maintaining a Sump Pump

Here are some tips for selecting and maintaining a sump pump, but for fast, professional service give us call!

If you have a house with a basement or crawl space, you likely have a sump pump. From time to time, these pumps need to be replaced. Knowing what type of pump works best for your situation will keep failures, flooded basements and other hazards to a minimum.

There are two main types of sump pumps: pedestal and submersible. A pedestal type pump has the motor attached to the top of a shaft. The motor is not designed to be under water. A pedestal pump works well in small diameter basins.

Submersible pumps are designed to sit in the base of the sump basin, below water level. These are more adapted to larger sump basins and are typically quieter than pedestal pumps.

Sump pumps usually come with an automatic on/off switch. A float switch is the most common. As the float rises with rising water levels in the basin, the pump is started after the water rises to a certain level.

To determine the size of pump needed you must know how much water will need to be pumped, how high the water will be pumped, and the length and size of pipe. Do not assume that having a large horsepower pump will be the best choice. A large horsepower pump in a small diameter basin will cause the pump to cycle frequently, shortening pump life. At the same time, you need a pump that will keep up with maximum drainage. Pump capacity charts are available through professional installers or pump manufacturers, or they can be found on the web.

When installing a sump pump, it is usually recommended that a check valve be installed. This prevents water left in the outlet pipe from flowing back into the basin. Some valves can be attached to the sump pump itself, while others are placed farther up the outlet pipe. If the valve is not attached to the pump, it is recommended that a 1/8-inch air relief hole be drilled into the outlet pipe, between the valve and the pump. This prevents a condition called an air lock, where the pump will attempt to work but cannot pump water. Be sure the air relief hole is placed so that any water that comes out of the hole will remain in the drainage basin!

A dedicated electrical circuit should be used for the pump. Most pumps have a high amp load when starting. Do not use an extension cord to plug the pump into the outlet.

To maintain a sump pump, periodically check the system. Make sure the float is free of obstructions. Observe the outlet to make sure water is actually being pumped. Listen for unusual noises when the pump is running. If the pump runs just a few months of the year, fill the basin with water and make sure the system is operating before its normal operation time begins.

If a sump pump fails, and water gets into the basement, do not attempt repairs without first turning off the power to all basement outlets. To minimize long term indoor air quality concerns, dry the areas affected as soon as possible. If flooding is severe or long lasting, dry wall, carpeting and other materials may need to be replaced.

If a quality pump is used that is properly sized, it should last three or more years, with 10 years being reasonable, according to the U.S. Department of Housing and Development. When purchasing a pump, look for one that is built and tested according to Sump and Sewage Pump Manufacturers Association (SSPMA) specifications.


Source: University of Illinois

Space Heater Safety

The U.S. Consumer Product Safety Commission (CPSC) estimates that in 1994, electric space heaters were associated with 2,400 fires resulting 80 deaths, 240 injuries and $48.2 million in property loss.

The Problem

Even though electric space heaters don’t have an open flame, the heating elements of some types of electric heaters are hot enough to ignite nearby combustibles like draperies, paper, clothing, furniture, and flammable liquids. It is, therefore, important to check surrounding objects periodically to see if they feel hot. Refer to the manufacturer’s instructions to see how far the heater should be placed from combustible materials, and for how far the heater should be placed from the floor so that carpeting or flooring materials don’t ignite.

Additionally, to prevent electrocutions, always keep portable electric heaters away from water, never use them in a bathroom or near a sink. (If you must use an appliance near water, always use a ground fault circuit interrupter).

CPSC Recommends the following when selecting an electric heater:

  • Look for one that is listed with a nationally-recognized testing laboratory. These heaters have been tested to meet specific safety standards, and manufacturers are required to provide important use and care information to the consumer. On heaters that are not listed, consumers have less assurance that the safety features and operating instructions are adequate.
  • Purchase a heater with a guard around the heating element. A wire grill or other protection is essential to keep fingers or fabrics from touching the hot element. Portable electric heaters that heat by circulating oil or water, however, usually have lower surface temperatures and may not need guards.
  • Before using the heater, read and follow the instructions for its operation and maintenance.
  • If you must use an extension cord, make sure it is a heavy duty cord marked with a # 14 gauge or larger wire An incorrectly-sized cord may create a fire hazard. If the heater’s plug has a grounding prong, use only a grounding (three-wire) extension cord.
  • Never run the heater’s cord (or any cord) under rugs or carpeting.
  • Do not leave the heater operating unattended or operating while sleeping. Portable electric air heaters are designed for use only as temporary supplemental heating and only while attended.
  • To prevent electrical shocks and electrocutions, always keep portable electric heaters away from water and never touch an electric heater if you are wet.

Safety Tips

  • Do not use an electric heater as a dryer by placing clothing over it and never use it heater to thaw pipes.
  • Keep the heater in safe working condition Replace missing guards and controls at once. Never operate a defective heater.
  • Don’t place the heater where children might play near it or where people might trip over or bump into it.
  • Place the heater on a level surface for stability.

Regardless of the type of heating system you have, install and maintain at least one smoke detector that is in good working condition on each floor of your home.


U.S. Consumer Product Safety Commission (CPSC)

Unclogging a Sink Drain

Here are easy-to-follow instructions on how to unstop your kitchen or bathroom sink drains.

Read these instructions carefully before tackling this job on your own, and see below to learn how Your 1 Plumber can help.

Unclogging Moderately Clogged Drains

  • If you have a moderately clogged drain, try this homemade drain cleaner: Pour 1/2 cup of baking soda down the drain followed by 1/2 cup of vinegar. Be careful. The two ingredients interact with foaming and fumes, so replace the drain cover loosely. Let the concoction set for about three hours before running water.
  • If you know the slow drain is from grease, try this treatment: Pour in 1/2 cup of salt and 1/2 cup of baking soda followed by a teakettle of boiling water. Allow to sit overnight.

Alternative Approach for Moderately Clogged Drains

  • If the drain is sluggish but not completely clogged, turn on the hot water tap for 5 to 10 minutes. This sometimes opens the drain.
  • If running hot water does not open the sluggish drain, try an environmentally safe chemical drain opener like Bio-Clean.  It’s a powder that mixes with water, and can only be obtained from quality plumbing companies like Your 1 Plumber.  Before using Bio-Clean, read the label and follow the manufacturer’s instructions.
  • After using any chemical cleaner, flush it from the drain pipes by allowing hot water to run for at least 10 minutes.

Unclogging Completely Clogged Drains

  • In some cases, using a simple suction cup will open a clogged sink drain.
  • Remove the basket strainer from the drain.
  • Run hot water until it stands about 2″ deep in the sink.
  • Take a suction cup plunger and pump it up and down directly over the clogged drain. The water in the sink provides a seal. If the suction cup does not clear the drain in a few minutes, you will probably be forced to remove some of the pipes to get the job done
  • If you cannot open the drain with the suction cup, set a pail underneath the sink trap and remove  the cleanout plug and washer. If the drain is only slightly clogged, a few quick probes with a screwdriver may solve the problem.
  • If the screwdriver doesn’t open it, use a snake or drain auger through the pipe. A drain auger works best if you rotate it, feed it in a short distance, and then rotate it again. This enables the drain auger to be inserted deeply into the pipe.
  • After the drain pipe is opened, replace the cleanout plug and washer. Run scalding water through the pipe to carry away any accumulations.

Need a Little Friendly Assistance?

If you have trouble with any part of this process, give us a call and if we’re not immediately available to assist you, one of our technicians will return your call at the very first opportunity.

Or, if the project proves to be more than you care to tackle yourself, here’s a $35 savings you can apply to our professional drain cleaning services!

Professional Drain Cleaning Coupon


Gas-Fired Water Heater Safety

The Consumer Product Safety Commission has been working to reduce the risk of injuries and deaths from gas-fired water heaters.

The Commission was briefed on the issue by CPSC staff in June of 1994. The Commission let the industry know that it wanted to see a solution to this problem, and that it was considering development of a Federal regulation that would address the problem of flammable vapor ignition in gas-fired heaters.

Prior to 1994, the Commission staff had been seeking a permanent, technical solution to the hazard of flammable vapors. Commission staff believed that this problem required not only the education of consumers about the proper use and storage of flammable liquids, but also a redesign of water heaters.

Following the June 1994 Commission meeting, industry officials informed the Commission that they were working on a technical solution — a redesign of water heaters — that would eliminate the ignition of flammable vapors by water heaters. Industry also expressed a willingness to work closely in voluntary cooperation with CPSC on the issue.

Giving industry the opportunity to voluntarily develop the technology necessary to achieve a permanent solution has several advantages over regulation. The voluntary approach results in manufacturers investing their own resources in developing test methodologies — saving taxpayer dollars and making use of industry’s knowledge and technical expertise about the product they manufacture.

In December, 1994, following the water heater manufacturers’ offer to work with CPSC to eliminate the hazard, the Commission agreed to postpone the regulatory process. But, CPSC Chairman Ann Brown expressly stated that industry must make real progress toward a technical solution and on developing a performance standard by which the safety of any new design could be measured.

As part of the CPSC’s participation with industry in the efforts to reach a technical solution to this problem, CPSC staff has been closely monitoring the development of vapor-ignition resistant water heaters by the Water Heater Joint Research and Development Consortium. Three prototypes have already been tested and performed well in flammability tests.

The industry is funding the independent development of that performance test standard. The Gas Research Institute is developing a way to test gas-fired water heaters to ensure that they will not ignite flammable vapors. A technical advisory group consisting of representatives from the gas industry, manufacturers, industry trade associations and CPSC staff, oversees this project.

The Commission has also worked with industry to educate the public on the hazard of flammable vapors. The Commission endorsed a large public information campaign launched by the Gas Appliance Manufacturers Association in 1994 which included television commercials and materials designed to appeal to and inform children about the hazard. In addition, the Commission published its own information on the hazard in its home and fire safety brochures.

To reduce the hazard of flammable vapors, consumers should:

  • Make sure gas-fired water heaters are installed according to code requirements;
  • Where possible, elevate heaters 18 inches from the floor, whether installed in a basement or garage;
  • Never use gasoline to clean equipment or tools;
  • Use gasoline only as a motor fuel;
  • Store gasoline only in tightly sealed red containers intended for gasoline; and
  • Keep all flammable materials and liquids away from gas-fired water heaters.

U.S. Consumer Product Safety Commission

Water Hardness

A complete guide to water hardness – questions, answers, and general information regarding water hardness.

Tap Water pH

My Neighbor Had This Test Done and Was Told the City Water is Alkaline and Hard. Is This True?

Only if compared to water that is acidic and very soft. The pH (acid/alkaline level) of tap water leaving the treatment plants is about 7.5, which is close to neutral. Completely neutral water is 7.0 on a scale of 0 to 14. Water less than 7 is considered acidic. City water is discharged slightly alkaline to prevent corrosion of water pipes and to help maintain adequate disinfection of the water, which is more effective at a higher pH.

And What Does That Mean Anyway?

“Hard” refers to a measure of difficulty — how hard it is to form lather and suds — and to the hard mineral deposit left on fixtures. “Soft” water uses less soap and detergent to form lather and suds, and can make clothing and skin feel softer.

What are These Grains of Hardness That People Refer To?

Water hardness is expressed in one of two units of measurement. The first unit is parts per million (ppm) and the second expression of hardness is grains per gallon (gpg). A gpg equals about 17 ppm.

My Neighbor Said City Water Has a Hardness of 2-3 gpg. I Have No Idea What That Means. Is That Hard or Soft?

It depends on who you ask. The US Geological Survey established levels of hardness in 1962. These classifications are given below.

ClassificationParts per MillionGrains per Gallon
Soft0 – 600 – 3.5
Moderately Soft61 – 1203.5 – 7.0
Moderately Hard121 – 1807.0 – 10.5
Very Hard181 +10.5 +

Private organizations such as the Water Quality Association have changed the government classifications so that only water below 1.0 gpg is considered soft, and the level from 1.0 to 3.5 is called slightly hard. WQA is a self-monitoring trade association of the home and commercial water treatment industry.

What Causes This Hardness? Should I Be Concerned About Some Kind of Contamination?

No. The level of hardness is determined mainly by the amount of two minerals, calcium and magnesium. From a health standpoint, these minerals have no adverse effects and are, in fact, essential daily nutrients. In addition, water contains trace amounts of vital minerals that are found only in minute quantities in the human body. Researchers have found that these tiny amounts can have a beneficial effect on human health.

Are There Advantages to Having Extremely Soft Water?

Very soft water won’t leave mineral deposits on pans or mineral scale buildup in hot water heaters. You will use less of household cleaning products like detergents, and less of personal hygiene products like shampoo. You may get longer life from appliances like dishwashers and washing machines.

What About Disadvantages to Softening?

Softening units remove calcium and magnesium minerals and replace them with sodium. For each gpg of hardness removed, 7.5 milligrams of sodium are added to each quart of water, a possible concern to those on low sodium diets. Softened water is also not recommended for watering plants due to its sodium content.

Softened water increases the potential for leaching metal from pipes, solder and plumbing fixtures. Increased levels of copper, lead, zinc and cadmium are found in soft water, especially when it stands overnight in the plumbing system. These levels can exceed EPA primary drinking water standards, especially for brass fixtures and faucets.

Why Would Anyone Soften the City Water if We Already Have Moderately Soft Water?

As the home water treatment industry has grown in the US, the concept of water softening has often been misconstrued as a purifying and cleansing process. This is due largely to exaggerated advertising and to consumer misconceptions about water treatment. In reality, hardness minerals can be a nuisance at high levels, but they are not a threat to health.


Source: © City of Greenboro

Choosing a Water Heater

The first step in choosing a water heater is to determine the appropriate fuel type.

Natural gas, oil, and propane water heaters are generally less expensive to operate than electric models. If you are considering electricity, check with your local utility company or electricity supplier to see if they offer off-peak electricity rates. If available, heating your water during off-peak hours will save you money.

Water Heater Resources
EREC Fact Sheet: Selecting a New Water Heater and Water Heating Fact Sheet

If you are in a moderate climate, consider a heat-pump water heater, which is more efficient than a conventional electric water heater. Though a heat-pump water heater may have a high initial cost, it can save up to 50% of your water heating bill in moderate climates. Heat pumps can be added onto your water heater or purchased as an integral part of a new water heater.

The efficiency of water heaters is indicated by their energy factor (EF), which is based on recovery efficiency, standby losses, and cycling losses. The higher the EF, the more efficient the water heater. Electric resistance water heaters have EFs ranging from 0.7 and 0.95; gas water heaters from 0.5 and 0.6, with some high-efficiency models ranging around 0.8; oil water heaters from 0.7 and 0.85; and heat-pump water heaters from 1.5 to 2.0. Everything else being equal, select a water heater with the highest energy factor (EF). Also look for a water heater with at least one-and-a-half inches of tank insulation and a heat trap.

In the United States, all water heaters are sold with EnergyGuide labels to indicate their energy efficiency. These labels provide estimated annual operating costs, and also indicate the cost of operating the models with the highest annual operating cost and the lowest annual operating cost. By comparing a model’s annual operating cost with the operating cost of the most efficient model, you can compare their efficiencies.

Although some consumers buy water heaters based on the size of the storage tank, the first-hour rating (FHR), provided on the EnergyGuide label, is actually more important. The FHR is a measure of how much hot water the heater will deliver during a busy hour. Before you buy a water heater, estimate your household’s peak-hour hot water use (your water use during morning showers, for instance) and look for a unit with an FHR in that range.

Demand water heaters are an option that should be considered when replacing a water heater or when building a new home. Demand water heaters only produce hot water when you need it, thereby avoiding the energy losses due to storing hot water. However, they have a low flow rate and may not be ideal for large families. For more information, see the Consumer’s Guide, Demand (Tankless) Water Heaters page.

Tankless coil water heaters use a heating coil installed in the main furnace for water heating. Common in oil-fired boilers and some gas-fired boilers, tankless coil water heaters are an inefficient means of heating water. A better solution is offered by indirect water heaters, which use the main furnace to heat a fluid that is then circulated through a tank of water. The energy stored by the water tank allows the furnace to turn on and off less often, thereby saving energy. If used with a high-efficiency boiler and a well-insulated tank, this can be the least expensive means of providing hot water.

For safety as well as energy-efficiency reasons, when buying gas- and oil-fired water heaters, look for units with sealed combustion or power venting to avoid back-drafting of combustion gases into the home.

Finally, it can save you energy and money to put some thought into the best location for your water heater. Whenever possible, do not install the water heater in an unheated basement. Also try to minimize the piping runs to your bathroom and kitchen.


U.S. Department of Energy – Energy Efficiency and Renewable Energy – Building Technologies Program

Sump Pump Types

A guide to sump pump types – features, key differences, installation, and more.

Pedestal – An electric pump that stands upright, with a motor a few feet above it that is not meant to get wet. It has a float-activated switch that turns the pump on when the water reaches a certain level. This type of sump pump is ideal for basements needing frequent water drainage. They usually are the least expensive but are noisier than the submersibles.

Submersible – These types of electrical pumps are installed in ground and are designed to work underwater. They have the same float-activated switch. They are more expensive than the pedestal pumps but are quieter and tend to have a longer life because their sealed, oil-cooled motors are protected from moisture and dust.

Plastic vs. Cast Iron
Plastic sump pumps suit some applications for the cost-conscience. Use cast iron models for contractor-grade, longer-lasting applications.

Water-powered – This type of pump runs off the water pressure from your home plumbing system and has the same float-activated switch. These pumps handle water at a comparable rate to the electric types, but require no electricity to operate. It can be installed along side an electric sump and is generally used as a back up system during a power failure.

Floor Sucker Pumps – New type of pump that is used mostly in basements, cellars or crawl spaces which do not have an actual sump pit. It is called a floor sucker pump because it removes water right down to within a 1/8″ of the floor (or from other surfaces like a roof or the ground). Available in various flow rates, manual or automatic operation, with some electronically controlled. These types of pumps were particularly useful during the east coast storms this fall.

No matter what type you have, each sump pump should have a check valve on the water outlet pipe so water does not flow back into the sump when the pump shuts off. Water flowing back and forth can cause the pump to turn on and off more than necessary and shorten the life of the pump.

Submersible Sump Pumps

The submersible sump pump features a watertight motor (sealed and submerged in oil) making it fully functional under water. It is placed at the bottom of a sump basin and installed below water level. Although a little more costly than the pedestal type, it has significant advantages.

  • typically quieter
  • requires less maintenance
  • out of plain sight
  • can handle larger quantities of water
  • less hazardous to children

Features

Sump pumps come in an array of sizes and styles. To find the right sump pump, begin by estimating your needs, and measure the size and depth of the sump pit to ensure a good fit. Two features that are important to consider when shopping around for a submersible sump pump are: GPM and horsepower.

Size and Power

  • Capacity of water flow – GPM (gallons per minute)
  • Horse power – motor capacity required to discharge the water

Manual and Automatic Switches

  • Float-activated switch
  • Sealed interior switch

An automatic switch is your best bet as it will activate the sump pump should flooding occur when you are not home. The manual switch requires that someone turn on the switch in order to start the sump pump.

Corrosion

When looking for parts or housings for your sump pump, make sure to avoid purchasing materials that corrode. Non-corroding materials such as cast bronze, alloy, stainless steel and epoxy-coated cast iron are durable and reliable.

Back-Up Plan

Like any other mechanical device, a submersible sump pump can break down. If your philosophy is “better to be safe than sorry”, you need to have a back-up plan in place.

Extra protective devices such as alarms and battery powered back up sump pumps can be purchased to provide you with peace of mind and additional assurance against water damage in case of system failure.

Installation

Free installation or installation at a small fee may be offered from the place of purchase; look into it. It is recommended that a submersible sump pump be installed by a professional. Improper installation can result in system malfunction and thus cannot guarantee protection against flooding.

Floor Sump Pump “The Floor Sucker”

Every home owner has a fear of coming home to a basement full of water. A leak as a result of heavy rain storms or an accidental pipe burst has the potential to cause severe damage to your basement or cellar area. Even a few inches of water can destroy your precious belongings and/or instantly wipe out your treasured memorabilia. If your home does not have a sump pump to protect your basement from water, it is crucial that you find another way of keeping water out. A floor sucker is a versatile utility sump pump that can handle the task.

The Effectiveness of a Floor Sucker

The floor sucker was created for homeowners who do not already have a sump pump in their home. The unit is highly versatile and can be used to protect your basement, cellar, roof and even crawl space against water damage. The floor sucker runs with the assistance of an oil-filled motor and is housed in an epoxy cast aluminum shell. It can be used fully or partially submerged, indoors and outdoors, and can drain down to 1/8 of an inch. Depending on your needs, there are different models available including the 1200 GPH pump which features a 1 inch discharge with garden hose adapter, a 26.3 inch shut-off head capability, and a screened inlet. In addition, each model has varying flow rates and can be manually or automatically operated. Other than for home purposes, a floor sucker can be used for commercial and industrial needs including pet applications, statuary fountains, pool covers, equine and livestock therapy, air conditioners and machine tool coolants. In any situation requiring the transfer or recirculation of liquid, the floor sucker is well-suited. So whatever your specific need, there is a pump that can safely and effectively handle the task.

Detect a Leak with a Water Alarm

You can never take too many precautions when it comes to protecting your home from water. A water alarm is a tool used to detect leaks that can cause irreparable damage. It detects water on a surface with its two metal contacts. The device runs off a standard 9v battery and can be placed in any location where there is a risk of water seepage.


Source: www.sump-pump-info.com

Sample of Boiler Manufacturer Response to Flooded Equipment

Technical Bulletin

Dated: September 28, 1999
Subject: Flooded Boilers
Issued by: Tom Senter, Weil McLain

This bulletin covers how to service a Weil-McLain cast iron boiler, which has been either partially or fully, under water due to flooding conditions.

DANGER
If any part of a boiler, burner or its controls has been sprayed or submerged under water, either partially or fully, DO NOT attempt to operate the boiler until the boiler has been either replaced or completely repaired, inspected, and you are sure that the boiler and all components are in good condition and fully reliable. Otherwise, by operating this boiler, you will cause a fire or explosion hazard, and an electrical shock hazard, leading to serious injury, death, or substantial property damage.

When a flooding condition has occurred with a boiler, you must follow one of these two (2) options:

  1. Replace the boiler which has experienced flooding conditions with a new Weil-McLain boiler, OR
  2. Thoroughly service the boiler which has experienced flooding conditions using the following guidelines:
    1. Replace all controls, gas valves, and electrical wiring on the boiler. Once an electrical control has been wet, it poses a fire and electrical shock risk and must be replaced. Gas valves are no longer assured to provide a safe shut-off to the gas, potentially causing gas leaks, fires, and explosions. Even mechanical devices such as float low water cut-offs and safety relief valves need to be replaces, as their components may become corroded, making the device unreliable for future use.
    2. Thoroughly inspect all burner tubes, gas piping, manifolds, orifices, and flue ways for signs of rust and/or sediment from the flood waters. The rust and sediment can prevent proper operation of the boiler if it is not cleaned out from the boiler.
    3. For oil-filled boilers, replace all oil burners. Oil burners, including Weil-McLain QB series burners, are complex systems consisting of solenoid valves, motors, electrodes, and pumps. If these components have experienced flooding, oil leaks, valve failures, and electrical faults may occur resulting in a severe fire hazard, potential injury or death. In the case of large commercial burners, such as Gorden-Piatt and Power Flame, it is more cost efficient to replace the entire burner rather than attempting to replace all the controls and repair the mechanical components.
    4. Replace all insulation that has become water damaged. This includes jacket insulation, base box insulation, and combustion chamber insulation and refractories. After insulation has become water damaged due to flooding, it may deteriorate, reducing its insulation value and causing a potential fire hazard. Also, it can pose a health risk due to bacteria from the flood waters remaining in the insulation.
    5. Where possible, inspect seal rings for damage from petroleum products. Flood waters are often contaminated with gasoline and other petroleum products, which damage elastomer seals used on most Weil-McLain boilers.
    6. Thoroughly inspect all venting for signs of corrosion. Replace any venting that is rusting or corroded in order to prevent flue gasses from entering the building through the venting system.

NOTE: Even if only part of the boiler has been submerged in flood waters, replace ALL controls, gas valves, and other components as noted above. There is no easy way to know which components may be damaged; and even if a control was not submerged, water can get inside components because of splashing, wicking action, and/or moisture in the air. Water and sediment easily enter controls, wiring, and insulation and other boiler components. Even if you can not see obvious signs of penetration, water and sediment may have entered a device and render it unsafe. Replacing the boiler is usually the quickest and most cost economical option when servicing a boiler that has experienced flooding. With so many areas of concern in attempting to repair a boiler that has experienced flooding conditions, replacing the boiler is generally the safest choice.

Energy-Efficient Water Heating

To lower your water heating bills, try one or more of these energy-saving strategies:

Reduce Your Hot Water Use

You can lower your water heating costs by using and wasting less hot water in your home. To conserve hot water, you can fix leaks, install low-flow fixtures, and purchase an energy-efficient dishwasher and clothes washer.

Fix Leaks

You can significantly reduce hot water use by simply repairing leaks in fixtures—faucets and shower heads—or pipes. A leak of one drip per second can cost $1 per month.

If your water heater’s tank leaks, you need a new water heater.

Install Low-Flow Fixtures

Federal regulations mandate that new shower head flow rates can’t exceed more than 2.5 gallons per minute (gpm) at a water pressure of 80 pounds per square inch (psi). New faucet flow rates can’t exceed 2.5 gpm at 80 psi or 2.2 gpm at 60 psi. You can purchase some quality, low-flow fixtures for around $10 to $20 a piece and achieve water savings of 25–60%.

Shower Heads

For maximum water efficiency, select a shower head with a flow rate of less than 2.5 gpm. There are two basic types of low-flow shower heads: aerating and laminar-flow. Aerating shower heads mix air with water, forming a misty spray. Laminar-flow shower heads form individual streams of water. If you live in a humid climate, you might want to use a laminar-flow shower head because it won’t create as much steam and moisture as an aerating one.

Before 1992, some shower heads had flow rates of 5.5 gpm. Therefore, if you have fixtures that pre-date 1992, you might want to replace them if you’re not sure of their flow rates. Here’s a quick test to determine whether you should replace a shower head:

  1. Place a bucket—marked in gallon increments—under your shower head.
  2. Turn on the shower at the normal water pressure you use.
  3. Time how many seconds it takes to fill the bucket to the 1-gallon (3.8 liter) mark.

If it takes less than 20 seconds to reach the 1-gallon mark, you could benefit from a low-flow shower head.

Faucets

The aerator—the screw-on tip of the faucet—ultimately determines the maximum flow rate of a faucet. Typically, new kitchen faucets come equipped with aerators that restrict flow rates to 2.2 gpm, while new bathroom faucets have ones that restrict flow rates from 1.5 to 0.5 gpm.

Aerators are inexpensive to replace and they can be one of the most cost-effective water conservation measures. For maximum water efficiency, purchase aerators that have flow rates of no more than 1.0 gpm. Some aerators even come with shut-off valves that allow you to stop the flow of water without affecting the temperature. When replacing an aerator, bring the one you’re replacing to the store with you to ensure a proper fit.

Energy-Efficient Dishwashers & Washing Machines

The biggest cost of washing dishes and clothes comes from the energy required to heat the water. You’ll significantly reduce your energy costs if you purchase and use an energy-efficient dishwasher and clothes washer.

Dishwashers

It’s commonly assumed that washing dishes by hand saves hot water. However, washing dishes by hand several time a day can be more expensive than operating an energy-efficient dishwasher. You can consume less energy with an energy-efficient dishwasher when properly used and when only operating it with full loads.

When purchasing a new dishwasher, check the EnergyGuide label to see how much energy it uses. Dishwashers fall into one of two categories: compact capacity and standard capacity. Although compact-capacity dishwashers may appear to be more energy efficient on the EnergyGuide Label, they hold fewer dishes, which may force you to use it more frequently. In this case, your energy costs could be higher than with a standard-capacity dishwasher.

One feature that makes a dishwasher more energy efficient is a booster heater. A booster heater increases the temperature of the water entering the dishwasher to the 140ºF recommended for cleaning. Some dishwashers have built-in boosters, while others require manual selection before the wash cycle begins. Some also only activate the booster during the heavy-duty cycle. Dishwashers with booster heaters typically cost more, but they pay for themselves with energy savings in about 1 year if you also lower the water temperature on your water heater.

Another dishwasher feature that reduces hot water use is the availability of cycle selections. Shorter cycles require less water, thereby reducing energy cost.

If you want to ensure that your new dishwasher is energy efficient, purchase one with an ENERGY STAR label.

Washing Machines

Unlike dishwashers, clothes washers don’t require a minimum temperature for optimum cleaning. Therefore, to reduce energy costs, you can use either cold or warm water for most laundry loads. Cold water is always sufficient for rinsing.

Inefficient clothes washers can cost three times as much to operate than energy-efficient ones. Select a new machine that allows you to adjust the water temperature and levels for different loads. Efficient clothes washers spin-dry your clothes more effectively too, saving energy when drying as well. Also, front-loading machines use less water and, consequently, less energy than top loaders.

Small-capacity clothes washers often have better EnergyGuide label ratings. However, a reduced capacity might increase the number of loads you need to run, which could increase your energy costs.

If you want to ensure that your new clothes washer is energy efficient, purchase one with an ENERGY STAR label.

Return to Top

Lower Your Water Heating Temperature

You can reduce your water heating costs by simply lowering the thermostat setting on your water heater. For each 10ºF reduction in water temperature, you can save between 3%–5% in energy costs.

Although some manufacturers set water heater thermostats at 140ºF, most households usually only require them set at 120ºF or even 115ºF. Water heated at 140ºF also poses a safety hazard—scalding. However, if you have a dishwasher without a booster heater, it may require a water temperature within a range of 130ºF to 140ºF for optimum cleaning.

Reducing your water temperature to 120ºF also slows mineral buildup and corrosion in your water heater and pipes. This helps your water heater last longer and operate at its maximum efficiency.

Consult your water heater owner’s manual for instructions on how to operate the thermostat. You can find a thermostat dial for a gas storage water heater near the bottom of the tank on the gas valve. Electric water heaters, on the other hand, may have thermostats positioned behind screw-on plates or panels. As a safety precaution, shut off the electricity to the water heater before removing/opening the panels. Keep in mind that an electric water heater may have two thermostats—one each for the upper and lower heating elements.

Mark the beginning temperature and the adjusted temperature on the thermostat dial for future reference. After turning it down, check the water temperature with a thermometer at the tap farthest from the water heater. Thermostat dials are often inaccurate. Several adjustments may be necessary before you get the right temperature.

If you plan to be away from home for at least 3 days, turn the thermostat down to the lowest setting or completely turn off the water heater. To turn off an electric water heater, switch off the circuit breaker to it. For a gas water heater, make sure you know how to safely relight the pilot light before turning it off.

Return to Top

Insulate Your Water Heater Tank

Unless your water heater’s storage tank already has a high R-value of insulation (at least R-24), adding insulation to it can reduce standby heat losses by 25%–45%. This will save you around 4%–9% in water heating costs.

If you don’t know your water heater tank’s R-value, touch it. A tank that’s warm to the touch needs additional insulation.

Insulating your storage water heater tank is fairly simple and inexpensive, and it will pay for itself in about a year. You can find pre-cut jackets or blankets available from around $10–$20. Choose one with an insulating value of at least R-8. Some utilities sell them at low prices, offer rebates, and even install them at a low or no cost.

Insulating a hot water heater

Insulating an Electric Water Heater Tank

You can probably install an insulating pre-cut jacket or blanket on your electric water heater tank yourself. Read and follow the directions carefully. Leave the thermostat access panel(s) uncovered. Don’t set the thermostat above 130ºF on electric water heater with an insulating jacket or blanket—the wiring may overheat.

You also might consider placing a piece of rigid insulation—a bottom board— under the tank of your electric water heater. This will help prevent heat loss into the floor, saving another 4%–9% of water heating energy. It’s best done when installing a new water heater.

Insulating a Gas Water Heater Tank

The installation of insulating blankets or jackets on gas and oil-fired water heater tanks is more difficult than those for electric water heater tanks. It’s best to have a qualified plumbing and heating contractor add the insulation. If you want to install it yourself, read and follow the directions very carefully. Keep the jacket or blanket away from the drain at the bottom and the flue at the top. Make sure the airflow to the burner isn’t obstructed. Leave the thermostat uncovered, and don’t insulate the top of a gas water heater tank—the insulation is combustible and can interfere with the draft perter.

Return to Top

Insulate Your Hot Water Pipes

Insulating your hot water pipes reduces heat loss and can raise water temperature 2ºF–4ºF hotter than uninsulated pipes can deliver, allowing for a lower water temperature setting. You also won’t have to wait as long for hot water when you turn on a faucet or showerhead, which helps conserve water.

Insulate all accessible hot water pipes, especially within 3 feet of the water heater. It’s also a good idea to insulate the cold water inlet pipes for the first 3 feet.

Use quality pipe insulation wrap, or neatly tape strips of fiberglass insulation around the pipes. Pipe sleeves made with polyethylene or neoprene foam are the most commonly used insulation. Match the pipe sleeve’s inside diameter to the pipe’s outside diameter for a snug fit. Place the pipe sleeve so the seam will be face down on the pipe. Tape, wire, or clamp (with a cable tie ) it every foot or two to secure it to the pipe. If you use tape, some recommend using acrylic tape instead of duct tape.

On gas water heaters, keep insulation at least 6 inches from the flue. If pipes are within 8 inches of the flue, your safest choice is to use fiberglass pipe-wrap (at least 1-inch thick) without a facing. You can use either wire or aluminum foil tape to secure it to the pipe.

Return to Top

Install Heat Traps on a Water Heater Tank

If your storage water heater doesn’t have heat traps, you can save energy by adding them to your water heating system. They can save you around $15–$30 on your water heating bill by preventing convective heat losses through the inlet and outlet pipes.

Heat traps—valves or loops of pipe—allow water to flow into the water heater tank but prevent unwanted hot-water flow out of the tank. The valves have balls inside that either float or sink into a seat, which stops convection. These specially designed valves come in pairs. The valves are designed differently for use in either the hot or cold water line.

A pair of heat traps costs only around $30. However, unless you can properly solder a pipe joint, heat traps require professional installation by a qualified plumbing and heating contractor. Therefore, heat traps are most cost effective if they’re installed at the same time as the water heater. Today, many new storage water heaters have factory-installed heat traps or have them available as an option.

Return to Top

Install a Timer and Use Off-Peak Power for an Electric Water Heater

If you have an electric water heater, you can save an additional 5%–12% of energy by installing a timer that turns it off at night when you don’t use hot water and/or during your utility’s peak demand times.

Hot water heater timer

You can install a timer yourself. They can cost $60 or more, but they can pay for themselves in about 1 year. Timers are most cost effective if you don’t want to install a heat trap and insulate your water heater tank and pipes. Timers aren’t as cost effective or useful on gas water heaters because of their pilot lights.

Contact your utility to see if it offers a demand management program. Some utilities offer “time of use” electricity rates that vary according to the demand on their system. They charge higher rates during “on-peak”< times and lower rates during “off-peak” times. Some even offer incentives to customers who allow them to install control devices that shut off electric water heaters during peak demand periods. These control devices may use radio signals that allow a utility to shut off a water heater remotely anytime demand is high. Shut-off periods are generally brief so customers experience no reduction in service.

Return to Top

Install a Drain-Water Heat Recovery System

Any hot water that goes down the drain carries away energy with it. That’s typically 80–90% of the energy used to heat water in a home. Drain-water (or greywater) heat recovery systems capture this energy to preheat cold water entering the water heater or going to other water fixtures.

How It Works

Drain-water heat recovery technology works well with all types of water heaters, especially with demand and solar water heaters.

Drain-Water Heat Recovery System

Also, drain-water heat exchangers can recover heat from the hot water used in showers, bathtubs, sinks, dishwashers, and clothes washers. They generally have the ability to store recovered heat for later use. You’ll need a unit with storage capacity for use with a dishwasher or clothes washer. Without storage capacity, you’ll only have useful energy during the simultaneous flow of cold water and heated drain water, like while showering.

Some storage-type systems have tanks containing a reservoir of clean water. Drain water flows through a spiral tube at the bottom of the heat storage tank. This warms the tank water, which rises to the top. Water heater intake water is preheated by circulation through a coil at the top of the tank.

Non-storage systems usually have a copper heat exchanger that replaces a vertical section of a main waste drain. As warm water flows down the waste drain, incoming cold water flows through a spiral copper tube wrapped tightly around the copper section of the waste drain. This preheats the incoming cold water that goes to the water heater or a fixture, such as a shower.

By preheating cold water, drain-water heat recovery systems help increase water heating capacity. This increased capacity really helps if you have an undersized water heater. You can also lower your water heating temperature without affecting the capacity.

Cost & Installation

Prices for drain-water heat recovery systems range from $300 to $500. You’ll need a qualified plumbing and heating contractor to install the system. Installation will usually be less expensive in new home construction. Paybacks range from 2.5 to 7 years, depending on how often the system is used.

Return to Top


U.S. Department of Energy – Energy Efficiency and Renewable Energy

Faucet Replacement: 6 Common Mistakes

While faucet replacement doesn’t have to be a hard and dirty job, you still need to be sure that you are taking your time and installing the faucet correctly.

And, as with most DIY projects, there are some common mistakes that you should avoid to make the job go smoothly. If you want to get the job done and done well, avoid doing the following:

1. Forgetting to Turn Off the Water

This one may seem like a no-brainer but it can make quite the mess.

Common Faucet Replacement Mistakes

To ensure that you don’t accidently end up injuring yourself and flooding your house, make sure to turn off the main water before you remove the old faucet to replace it.

2. Not Sealing the Threads

If you don’t use plumber’s tape or plumber’s putty to seal the threads on your drain connections, you are going to end up with leaks that could ruin and corrode not only your pipes, but also anything being stored under your sink. Not to mention the wasted water and money.

3. Reusing Old Parts

While quite often you can get away with reusing old parts, sometimes new is better. Reusing old p-traps and other parts, especially if they are made of metal, will only cause you more problems and headaches down the road.

4. Guessing About Parts

To save yourself a lot of time and hassle trying to guess what parts and sizes you need, take the old faucet to the hardware store with you so that you will know exactly what you need to purchase.

5. Soldering While Water is Still Dripping

Make sure that the pipes are 100% dry before trying to solder them. Dry pipes are much easier to solder together and you are less likely to make a mistake.

6. Not Giving Yourself Enough Time

Even though faucet replacement is a moderately easy job, make sure that you give yourself enough time not only to get the job done, but to get the job done even if there are some problems along the way. If you don’t allow yourself enough time and end up feeling that you are rushed, you have a greater chance of making a mistake.

Faucet Replacement Diagram

Need a Little Friendly Advice or Assistance?

If you need help replacing a faucet, give us a call.  If we’re not immediately available to assist you, one of our technicians will return your call at the very first opportunity.

Or, if the project proves to be more than you care to tackle yourself, here’s a $25 savings you can apply to our professional installation services!

Faucet Replacement Coupon