Are you a do-it-yourselfer? Here’s a step-by-step guide on how to repair a leaky faucet.
Step 1. Locate the Leak
Begin by inspecting the faucet to locate the leak. A loose packing nut probably causes a leak at the base of the handle. If water is leaking from the faucet, chances are a washer is worn and needs replacing. Turn off the water to the faucet at the turn-off valve and close the drain so small parts can’t slip down while working.
Step 2. Remove the Valve Unit
Remove any decorative caps from the cold or hot handles.
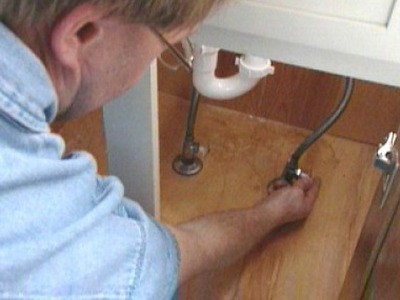
Unscrew the handles and remove them. Use smooth-jaw pliers to loosen the packing nut located under the handle. Now remove the entire valve unit and be sure to line up the parts in the order that you remove them so you can reassemble the faucet correctly.
Step 3. Replace a Worn or Damaged Washer
Inside the valve unit you will find a rubber washer held in place with a screw.
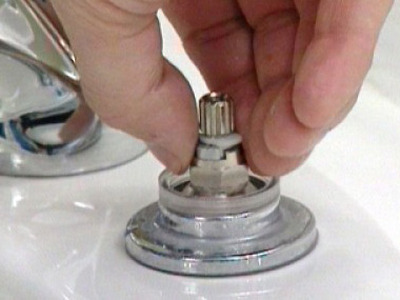
Loosen the screw and remove the washer. Check to see if the washer is worn or damaged. If it needs to be replaced make sure to match the size and thickness of the washer exactly. Place the valve unit back into the faucet, tighten the packing nut and replace the handle. Finally, turn the water back on and check for leaks.
Don’t Have Time to Fix it Yourself?
At Your 1 Plumber, we ALWAYS have time for great customers like you, and that includes answering your questions about repairing your leaky faucet over the phone. It’s all part of our expanded customer service capabilities.
Or, if you simply don’t have the time – or patience! – to fix it yourself, just give us a call and you’ll save $25 with the coupon below.
Stay tuned next month for another do-it-yourself project to help you save money on your plumbing and other household repairs.